Christmas Certificates
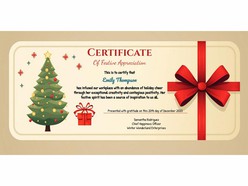
From personalized holiday surprises to corporate gifting, our templates add a touch of joy to your celebrations.
From personalized holiday surprises to corporate gifting, our templates add a touch of joy to your celebrations.
Recognizing accomplishments through certificates is a meaningful way to honor individuals in educational, professional, or personal settings. Google Docs offers a versatile platform to design and customize certificates that are both professional and personalized. Here's a step-by-step guide to creating a certificate in Google Docs:
Page Orientation: Navigate to File > Page setup, and set the orientation to Landscape for a traditional certificate layout.
Margins: Adjust margins to narrow or custom settings to maximize space for design elements.
Tables: Insert a single-cell table that spans the entire page to create a border. Adjust the border thickness and color to suit the desired aesthetic.
Images: Alternatively, insert a border image or use drawing tools to design a custom border.
Center the title at the top of the page using a large, bold font (e.g., 36–48 pt).
Common titles include:
"Certificate of Achievement"
"Certificate of Completion"
"Award of Excellence"
Below the title, add a line such as: "This is to certify that" or "Presented to."
Use a slightly smaller font size (e.g., 18–24 pt) and consider italicizing for emphasis.
Center the recipient's name prominently, using a distinctive font style and size (e.g., 24–36 pt).
Ensure the name stands out as the focal point of the certificate.
Add a brief description of the accomplishment, such as:
"For outstanding performance in [Subject/Activity]"
"In recognition of [Specific Achievement]"
Keep the text concise and centered.
At the bottom of the certificate, insert lines for:
Date: Include a line labeled "Date" for when the certificate is awarded.
Signature: Provide space for an authorized signature, labeled accordingly.
Insert relevant images, such as organizational logos or official seals, to authenticate the certificate.
Position these elements symmetrically, typically near the bottom corners.
Review the certificate for accuracy and design consistency.
To distribute:
Print: Use high-quality paper for physical copies.
Digital: Export as a PDF via File > Download > PDF Document for electronic sharing.
Accessibility: Create and edit certificates from any device with internet access.
Collaboration: Share documents with team members for input and approval.
Customization: Easily modify templates to suit various occasions and recipients.
Cost-Effective: Utilize free tools without the need for specialized software.
Crafting certificates in Google Docs combines efficiency with personalization, allowing for the creation of meaningful recognitions that can be easily shared and preserved. By following structured steps and utilizing available tools, you can design certificates that honor achievements in a professional and memorable manner.